How-To: Move your existing Linux install to ZFS on Root
Contents
Ever since I joined my new company two years ago, ZFS has been part of my work every day. And every day, I am amazed how great it is. So naturally, I wanted to move my existing Linux Mint 18 installation to boot off of ZFS. Why, you may wonder? Well that’s easy. Because now I can snapshot my root file system, I can roll back if I need to, and I can restore individual files in a heartbeat.
It took a bit of fiddling in the beginning, but once you know how it works, it’s a piece of cake. This short post shows you how to move your existing Linux installation to ZFS on root (preferably Ubuntu 16.04+ based, may work for others).
1. Requirements and Assumptions
For this example, we’re assuming that you’re running an Ubuntu 16.04+ based operating system (Ubuntu, Kubuntu, Xubuntu, Lubuntu, Linux Mint, …), and that you have another partition (to be used for the ZFS pool) with at least the amount of disk space that your current root partition has. If that is not the case, you can follow step 3 to make room.
2. This example: Kubuntu 16.04
In this example, I’ll be using a regular Kubuntu 16.04 installation. This could be your laptop or workstation, with any derivative of Ubuntu installed.
3. Creating the ZFS pool partition (optional)
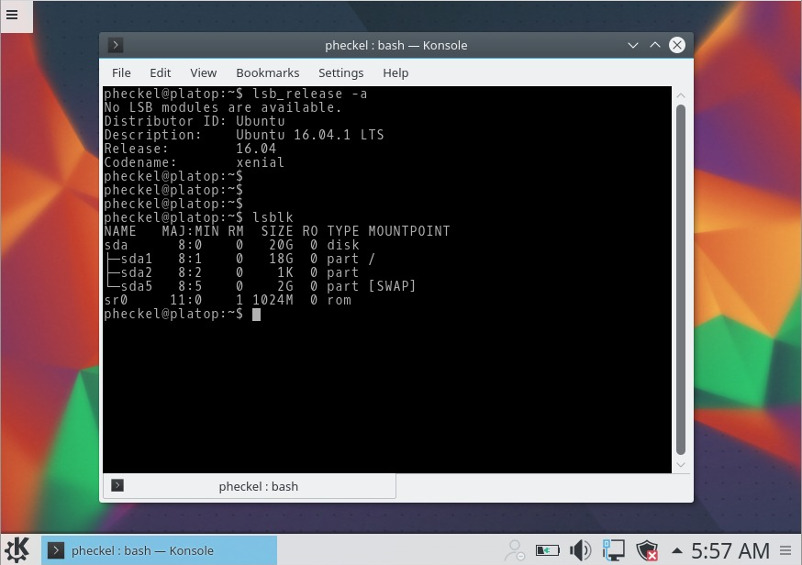
Optional (if you have no spare partition): As you can see in the screenshot above, lsblk shows us that the machine has no extra partition for a new ZFS pool (yet), so we’ll have to split the root partition to make room for the ZFS pool partition. If you already have a disk/partition that you want to use as a pool, you can skip this step.
To modify your root partition, you need to first boot an Ubuntu/Kubuntu/Mint Live CD/USB, so you can fiddle with the partition layout in gparted or the KDE Partition Manager. I have opted to boot into an Ubuntu Live CD (to make it clear that this is not your live system).
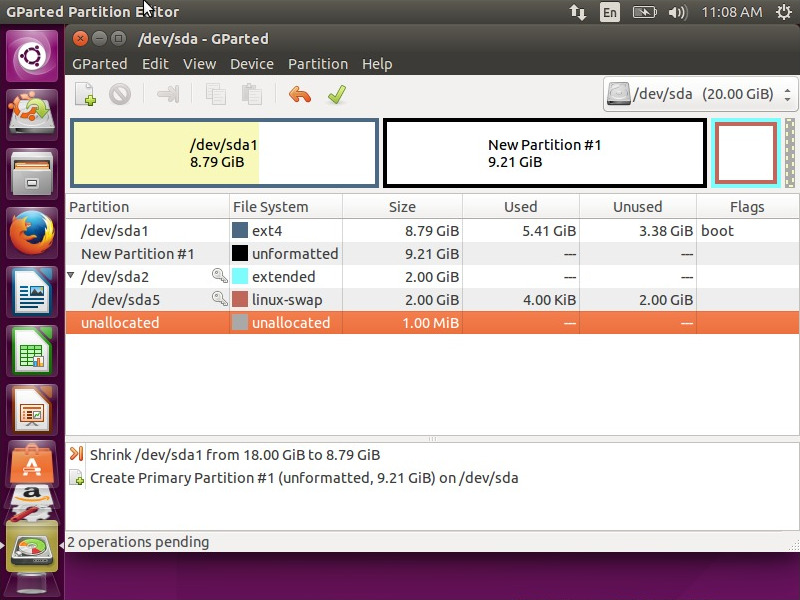
To split your root partition,
- Open gparted or KDE Partition Manager
- Select your root partition, right click and select “Resize”, enter the target size and hit “Apply”
- Then create a new (unformatted) partition in the empty space after the old root partition
- Click Apply (Warning: Back up your system before you do this. There is a chance of data loss!)
It should look something like this (if you’re using gparted):
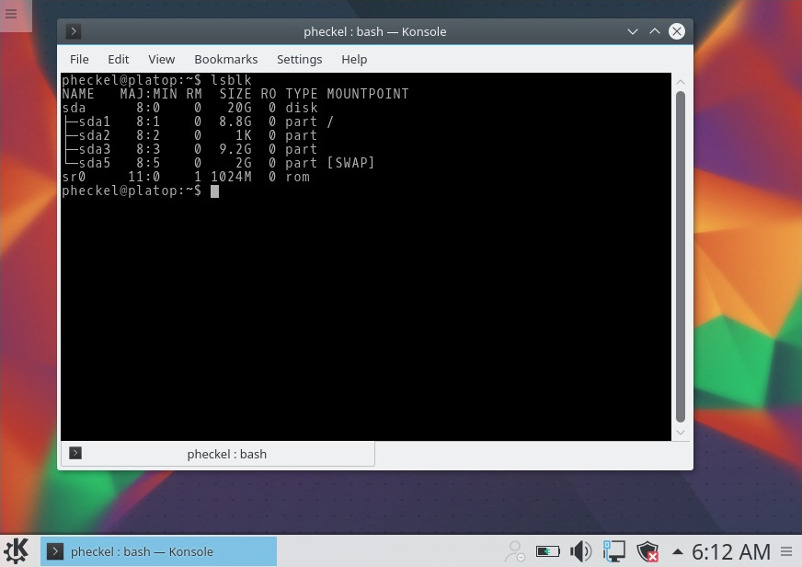
After you hit “Apply” and after you rebooted into your actual system, your disk layout changed and you have a new partition (here: /dev/sda3). This is the partition we will use to create the ZFS pool:
4. Creating the root ZFS pool, and copying your OS
Now that we have a free partition for our new pool, let’s first install ZFS (if you don’t have it already):
Install ZFS and its initramfs module
$ apt install zfs-dkms zfs-initramfs
Then, identify the newly created partition and create the root pool:
Identifying the new partition with lsblk
$ lsblk
NAME   MAJ:MIN RM  SIZE RO TYPE MOUNTPOINT
sda      8:0    0   20G  0 disk
├─sda1   8:1    0  8.8G  0 part /
├─sda2   8:2    0    1K  0 part
├─sda3   8:3    0  9.2G  0 part             # <<<<< Our new partition! It'll likely be different for you!
└─sda5   8:5    0    2G  0 part [SWAP]
Now create the root pool and the root dataset you want to use. I usually call my pools tank and put my systems in tank/os/<osname>, but this is really up to you:
Creating a pool and the ZFS datasets
$ zpool create tank /dev/sda3     # Warning, choose your partition here! ZFS does not forgive typos!
$ zfs create tank/os
$ zfs create tank/os/kubuntu1604

# Alternatively, use the by-id symlink like so:
# $ zpool create tank /dev/disk/by-id/....
After you created the new dataset, it is auto-mounted by ZFS at /tank/os/kubuntu1604. You may now start copying your running system to this location:
Copying the current system to the ZFS dataset
$ rsync -a --one-file-system / /tank/os/kubuntu1604/
This may take a while, depending on your disk I/O speed and load; and it may even throw some warnings. Usually these warnings can be safely ignored if they are about files in /proc.
5. Make system bootable
Now that we have the dataset of our new root file system (tank/os/kubuntu1604), we need to tell our bootloader (here: grub2) that it should boot into the new system. To do that, we need to chroot into the system and run update-grub and grub-install:
Chrooting into the new system, and updating grub
$ cd /tank/os/kubuntu1604
$ mount --bind /dev dev
$ mount --bind /proc proc
$ mount --bind /sys sys
$ mount --bind /run run
$ chroot .

# You are now in the new system. Your current "/" points to "/tank/os/kubuntu1604"
# All the following commands will apply only to that system.

$ update-grub
Generating grub configuration file ...
Warning: Setting GRUB_TIMEOUT to a non-zero value when GRUB_HIDDEN_TIMEOUT is set is no longer supported.
Found linux image: /boot/vmlinuz-4.4.0-31-generic
Found initrd image: /boot/initrd.img-4.4.0-31-generic
Found memtest86+ image: /os/kubuntu1604@/boot/memtest86+.elf
Found memtest86+ image: /os/kubuntu1604@/boot/memtest86+.bin
Found Ubuntu 16.04.1 LTS (16.04) on /dev/sda1
done

$ grub-install /dev/sda                # Note: This should be your root disk (not partition!)
Installing for i386-pc platform.
Installation finished. No error reported.

$ exit
$ reboot
That’s it. During the reboot, if you press ESC, you can see that the grub menu will show the new system as “Ubuntu”, and the old system as “Ubuntu 16.04.1 LTS (16.04) on /dev/sda1”. That means if you’re having trouble with your ZFS on Root based system, you can always go back to your old system:
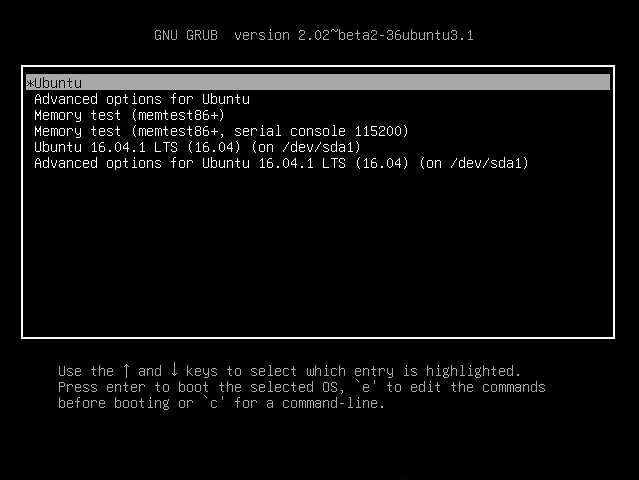
Once you booted, you can verify that you’re indeed running on ZFS with zfs list or mount:
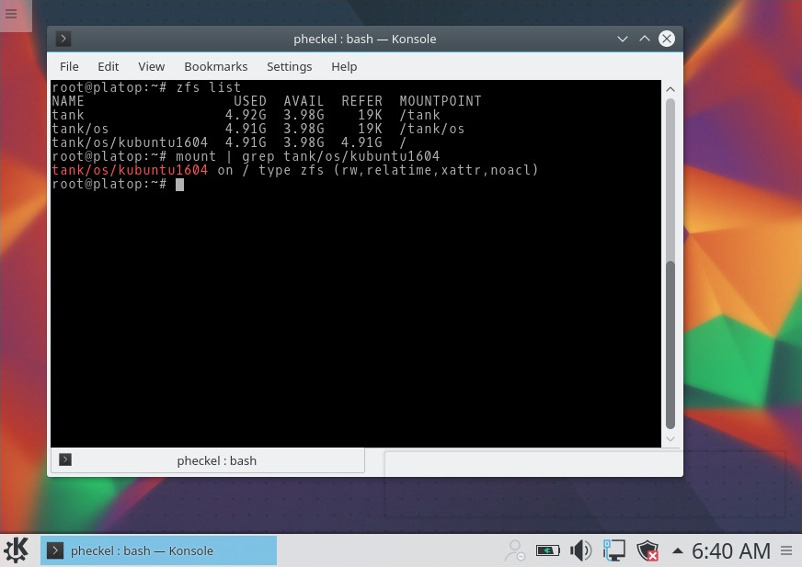
6. Snapshot your system regularly, accessing snapshots
You can (and should) now snapshot your root file system, and you can even roll back if you really want to. The first thing you should do is set up a cronjob to regularly snapshot your system:
Snapshotting your root file system regularly
$ crontab -e # as root!

# Then add a line line this:
0  20     * * * zfs snapshot tank/os/kubuntu1604@`date +\%y\%m\%d\%H\%M`
Once you’ve done that, you can always restore individual files by accessing the ZFS directory in /.zfs/snapshot/<snapshotname>, like this:
Restoring a file from an old snapshot
$ cp /.zfs/snapshot/1612221520/etc/hosts /etc/hosts
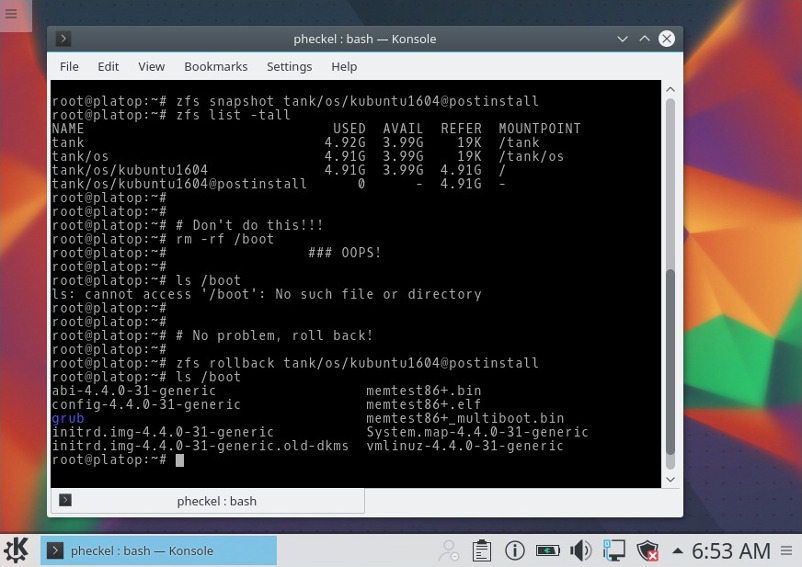
Or, if you really messed up, you can also completely roll back to an old snapshot (use with caution, as running programs may expect the disk contents to be different!):